Showing posts with label charcuterie. Show all posts

Friday, November 02, 2007

Makin' Bacon

Attention vegetarians - STOP READING THIS POST!!!!

Danger lies ahead. Not like many veg-heads are probably lurking on a blog with this title, but in all fairness, I have to offer a warning that today's subject matter may - well, might just cause you to question the validity of your own existance, or at the very least, induce a debilitating feeling of jealousy. And I just can't be responsible for that.

For the rest of us, we are talking, of course, about the great elixir of life - bacon.

Recently I bought Michael Ruhlman's book Charcuterie, a brilliant guide for the home cook - turned meat man. This well crafted collection of principles and techniques is a veritable encyclopedia of meat artistry. Techniques like salt curing, sausage making, confit are all in there, as well as a vital explaination of food safety concerns and how to avoid them. If you are at all interested in trying your hand at these time honored techniques, I can't reccomend this book enough. Although there are some complex and time consuming projects, there are plenty of relativly straightforward items to get you started. This was precicely the information I needed to take my meat game from foolish novice to... um, slightly less foolish novice.

Bacon caught my eye, as it doesn't require any special aging environment (still waiting for the basement to cool for the winter season). It's also still warm enough to justify standing outside for a few hours to babysit the smoker. Plus, who doesn't like bacon? There is a lot of time involved, but most of it is just waiting. It's acutally not too hard to make. Simply get a slab of pork belly, apply a cure, store in the fridge for a week, rinse and dry, smoke the cured belly (now called fresh bacon), and eat. See? Simple. The cure has some flexibility in the flavor department (maple syrup? black pepper? molasses?), but the elements of salt, curing salt, and brown sugar are essential to ensure safety and balance of flavor.

So after all this trouble, you ask, was it worth it? As my Scottish friend would say, it was the dog's bollocks!!! Rich with bacon-y goodness, it posessed a depth of flavor that is lacking in typical commercial bacon. Already, I'm thinking about my next batch once the 5 lbs I made are gone. At this rate, it might be just a couple of weeks away! I don't have to tell you, but the eating options are limitless. In the past week alone, I've used my bacon for:

- plain old bacon strips
- cobb salad
- chicken club sandwich (avocado makes this perfect)
- bacon and shrimp chowder
- and of course, the classic BLT

Let the photo essay begin!


Fresh pork belly, 5lbs - I used organic meat from a trusted supplier. Hey, if you're going through all the trouble of making your own bacon, the least you can do is start with the best possible meat.


Applying the cure. Special thanks to my daughter Elisabeth. Making homemade bacon at 2 years old... I'm so proud!


The cure is applied and rubbed in. Now the waiting starts.


7 days later... The curing is complete. Cure has been washed off and meat placed on an elevated rack to dry. A tacky, dry skin is called a pellicle, and is critical in order for the meat to absorb the smoke flavor.


Smoking in my cheap smoker. Hey - it gets the job done. I used cherry wood (happened to have on hand) and placed a pan of apple cider inside. I tried to maintain the temp at about 125. The bacon smoked for about 4 hours.


Out of the smoker. Looking good...


Ohhhhhhhhh... Aaaahhhhh. Excuse me. I just had a moment.


After baking in the oven (400 deg, about 10 minutes).


With this bacon, a BLT has never been better. Don't mess with a classic - bacon, crisp lettuce, fresh tomato, mayo, and, of course, decent bread.

Tuesday, July 11, 2006

Confit is Neat

If you have never had the pleasure of eating duck confit, you are missing out on one delicious life experience. Don't be put off - it sounds fancy, but all "confit" means is that the duck has been salted and slowly cooked in fat - traditionally it's own fat. I know, sounds somewhat frightening, but remember that duck fat is one of the tastiest substances on the planet and that slow cooking over low heat makes the meat fall-off-the-bone tender.

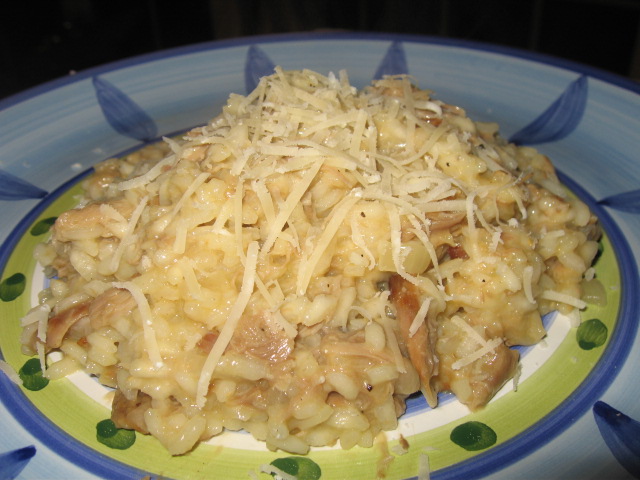
I decided to make a risotto out of my confit. Since duck has a fairly strong flavor, I thought that Parmigiano Reggiano would stand up nicely as a complimentary flavor due to its sharpness and nuttiness.

Risotto with Duck Confit and Parmigiano


1 c arborio or carnaroli rice
3 c chicken stock
1/2 c dry white wine
1 medium onion, diced finely (about 3/4 c)
1 t fresh thyme, leaves picked from stems
2 confit duck legs
1/2 c grated Parmigiano Reggiano
3 T duck fat or olive oil
Salt and pepper

Serves 4 as a first plate or 2 as a main dish

Sautee the onion in the duck fat over medium heat until the onion starts to turn translucent. Add the rice and stir to coat the rice grains with the fat. Let the rice "toast", stirring frequently until it begins to give off a nutty aroma. This should take about 4 minutes.

Add the wine and stir frequently, until it is absorbed. Add 1/2 c of the stock and continue stirring. When this stock is absorbed, add another 1/2 c of stock. Repeat this process, remembering to stir frequently, until the rice is just cooked. It should still have a chewey bite to it, but should not be at all crunchy (this is al dente). During the last 5 minutes of this process, shred the duck meat and add to the pot along with the thyme, salt, and pepper. When the rice is done, remove the pot from the heat and stir in the Parmigiano. Cover and let sit for 5 minutes before serving.


Duck Confit

2-3 c duck fat
2 duck legs
Kosher salt and pepper

This is so simple and yet so unbelievably good. If you don't have enough duck fat, throw some bacon fat in to help. Not traditional, but tastes fantastic. When you're done, put the fat in a container and store in the freezer to use next time.

Preheat the oven to 225. Season the duck legs with the salt and pepper. In a small pot, sear legs over medium-high heat until skin begins to turn golden brown. Add fat to the pan until the legs are completely covered. Cover the pan with a lid and place in the oven for 3-4 hours.

Note: Traditional duck confit would be salted and stored in the refrigerator overnight prior to cooking. This helps preserve the meat. This never lasts long in my house, so I usually skip this step.

Monday, May 08, 2006

The Tasting

Part 3

Just like with the sausages, it was difficult to let a day go by without going down to the basement to check on the progress of my experiment. Within a couple of days, the surface of the meat was dry and began to darken in color.

I should point out that the meat was hanging just 10 feet or so away from the washer and dryer. So every time that my lovely wife was downstairs to do a load of laundry, she was forced to come face to face with the jowls. Some of you may be wondering what her thoughts were about this whole meat curing madness - I think it best that she speak for herself.

"That thing better not smell!"
"How long does it have to be there?"
"I'm not eating any of that, you know."
"That's disgusting - I can't stand to look at it."

Yup, that about sums it up.

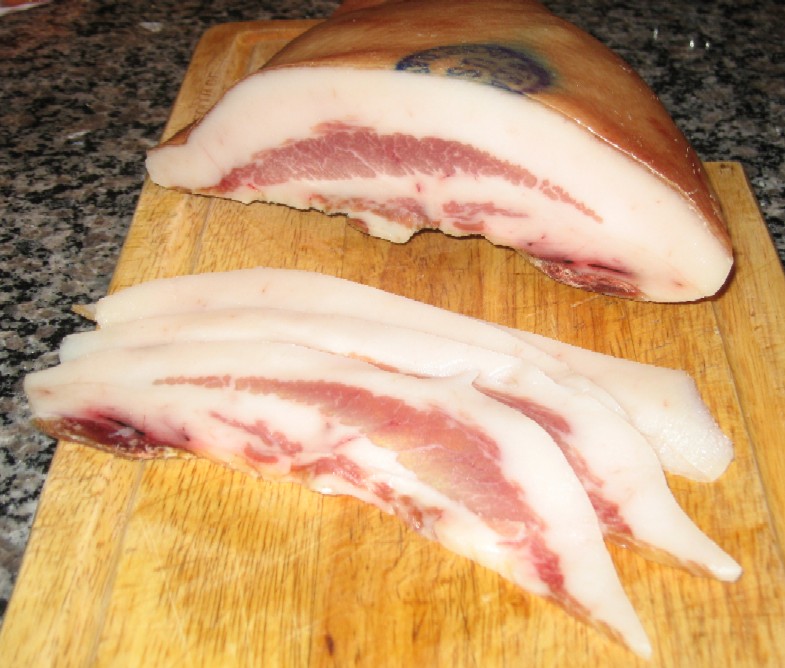
The 6 weeks came and went pretty quickly (partially aided by a two week trip to China). It was time to cut it down and eat. I washed off the salt which had dried and hardened into a rigid shell, trimmed the end, and carved myself a thin slice. It tasted a lot like prosciutto, but less salty. This was a good sign. Since guanciale is almost always cooked before serving, I sliced off another piece and sauteed it up. The flavor was surprisingly like bacon despite the complete lack of smoke used in the preparation process. However, the flavor was richer and, well, meatier. And it was awesome!


Mmmmmm...  Guanciale.


Honestly, as a first foray, I would have been quite happy if the stuff had been simply edible. Instead, I got something that surpassed my wildest expectations. If I had known how good this was going to be, those 6 weeks would have been a lot longer! I wrapped my prize in a freezer bag and placed it delicately in the fridge. I went to sleep a happy man that night. Two days later, having experienced no health issues, I was confident that the guanciale was safe to eat.

With a viable product to use, I could now get down to the businiss of cooking with my guanciale. I decided to first try an old favorite, Pasta alla Carbonara. I had always made this dish with pancetta (which there's nothing wrong with), but I was told that guanciale makes an especially mean carbonara. I have included my own recipe at the end of this post. Let's just say that you should make this - even if you can't get your hands on some guanciale. Pancetta will make a great dish too, just different.

So I made carbonara for dinner, with a skeptical wife squinting her eyes at me with a look that said, "You're not going to make me eat that, are you?" When I was done, I prepared a plate and brought it out to my bride. Now that there was hot, ridiculously good looking food that smelled great out on the table, Hollis began to rethink her vehement protesting. She enjoyed every bite.

With this rousing success under my belt, I turned my attention to the most famous of guanciale dishes - Bucatini all'Amatriciana. Since I had never had this dish, I used the method that Josh Friedland described in his article. Once again, the dish was fantastic. The tomatoes and hot spice are a nice compliment to the richness and flavor of the guanciale in this dish. I would definitely make this again.


Bucatini is like a hollow spaghetti

Pork-face pasta aka Bucatini all'Amatriciana


I still have about 2/3 of the guanciale sitting safely in the fridge, so if anyone is interested in taking some, let me know. And if you happen to be in the Fitchburg area, come on by and experience the fatty goodness for yourself. Maybe this is the only fitting end to this story. It's one thing to read about food, but real understanding can only come in the tasting of it.


Part 1 - In Pursuit of Guanciale
Part 2 - Getting Cheeky

Rich's Carbonara
Serves 2 as a main dish

1/4 lb guanciale, sliced and roughly chopped
1/2 c dry white wine
2 eggs
1/4 c grated pecorino romano cheese
1/2 c grated Parmigiano Reggiano
Lots of freshly ground black pepper
1/2 lb pasta - I prefer tagliatelli or fettucini
2Tbsp olive oil
Salt

Put a large pot of water on to boil. Meanwhile, get together all the other ingredients.

Once the pasta water has come to a boil, add the olive oil and guanciale to a large, heavy skillet over medium heat. The guanciale should brown and render out all the fat, crisping up in the process. While the guanciale is browning up, add 3-4Tbsp of salt to the pasta water and then add in the pasta. This starts your timeclock - remember, the pasta never waits for the sauce! Tagliatelli should cook for about 8-10 minutes, so keep this in mind.

In a medium sized bowl, beat the eggs and add the two cheeses and a good 2 Tbsp of coarsely ground black pepper (about 20 twists or so - you are using fresh ground pepper, aren't you?) and mix together. Reserve.

Once the guanciale is browned and crispy, deglaze the pan with the white wine. Scrape all the brown bits from the bottom of the pan. This is tasty stuff. Let the wine reduce until it is 25% of its original volume, about 4-5 minutes. At this point, the pasta should be cooked al dente and is ready to come out. Take the pan with the guanciale and reduced wine off of the heat and add the pasta. Add the egg mixture, stirring continuously so that every strand of pasta is coated, but the eggs do not scramble (the residual heat from the pasta and the pan will "cook" the eggs, making a rich sauce). Top with extra Parmigiano Reggiano and black pepper before serving.


Carbonara-Yum!

Saturday, May 06, 2006

Getting Cheeky

Part 2

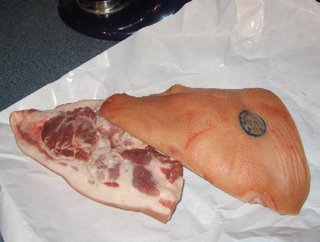
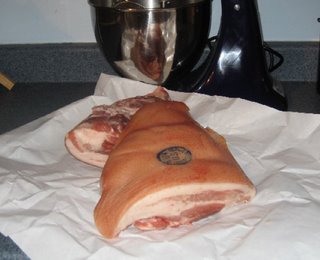
I am not really sure what I was expecting, but the jowls were much bigger than I had anticipated. They were superbly fresh (a benefit of buying from a local farm that raises it's own animals) and had almost no odor. The skin was still on - which besides raising the question of whether or not I should remove it, made it visually obvious what this piece of meat was. Now what's the big deal about eating pig cheeks? It's meat, isn't it? Not to gross out any of you who don't like to think of these things, but all meat comes from animals. So what difference does it make if it's the leg, the shoulder, or the cheeks?

No matter, I had all the supplies I needed to get started and I was more than ready to go. I had decided to follow the Mario Batali recipe referenced in Friedland's article - after all, he is an Iron Chef. Plus, he serves his homemade guanciale in his restaurant, so you know it's gotta be okay. What should I do about the skin? None of the articles I read seemed to offer any help. I also took a cursory look through some forums at egullet, but no luck there either. The skin is very thick, so it would make it a little harder for the salt to penetrate through to the center of the meat. But Prosciutto di Parma is made with the skin on... Screw it - I'll just leave it on.

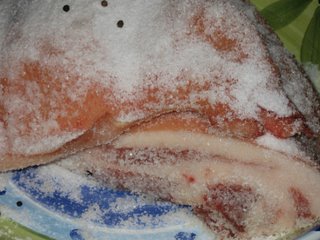
The cure is simple - equal parts salt and sugar, with a few peppercorns and some fresh thyme. Just cover the meat, making sure to rub the cure on every exposed surface. There should be plenty of cure, and the meat should be almost completely covered. A week in the fridge and it would be time to hang.

Yup, it's pig face. Get over it.

That's gonna make a lot of bacon!

Applying the cure

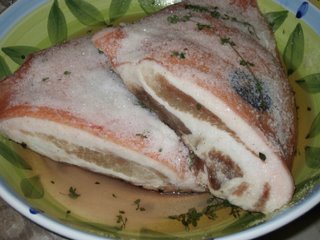
At this point, I checked on the progress every day. After a couple of days, it seemed like a lot of liquid had been released and there were some exposed sections of meat. I thought that it was probably okay, but just to be sure, I whipped up some more cure and reapplied.

Halfway through the in-fridge curing time

After a weeks' time, it was ready to hang the meat to dry for about 5 weeks. Then, it would be ready to taste the fruits of my labor.

Now fully cured, time to start the drying

Once again, the waiting began...


Part 1 - In Pursuit of Guanciale
Part 3 - The Tasting

Thursday, May 04, 2006

In Pursuit of Guanciale

Part 1


As we were planning our move from FL to MA, I realized that one of the benefits of moving up to the "frigid north" is that the winter creates the perfect environment for curing meat in the basement. I know, so I'm a little different than most people.

So I started to research the possibilities to see if this was mere fantasy or if it could realistically work out. I learned that I needed a cool, dry environment - 50-55F with 30% humidity or less (update: turns out, 60-70% humidity is ideal. Oops). Music to my ears. My basement is the perfect place for this from around November through April. Should I start out small or should I go after a serious project? I checked out this book which was full of great information. Prosciutto - the holy grail, would be awasome - but the 400 days it takes to cure is ridiculous. I decided to try something a little more basic.

I found this article by Josh Friedland called "The Art of the Cure," which described this journalist's introduction to the meat curing world. He decided to make guanciale - a cured Italian bacon made from hog jowls (yes, that would be the cheeks - the ones on the face). The description sounded delicious and at a short 6 weeks, I wouldn't have to wait too long to see if this whole process worked. I decided to give guanciale a go and see what happened.

The first challenge was actually finding hog jowls. I don't know if you've looked closely in the meat section of the grocery store, but hog jowls are not a particularly common item. I decided to look in some more "low end" stores that tend to stock these cheaper, undesirable cuts of meat. No luck. I even tried a local Chinese market by my house. They had pork ears, pork tails, pork intestines, hearts, feet, liver, and kidneys - but no jowls. My plan was falling apart before I even started. Eventually, I located a local farm that could deliver - but I would have to wait 4-6 weeks.

I decided that I didn't want to risk having the winter go by without trying any type of curing experiment, so I needed to come up with a plan B in short order. I called my Italian friend Lamberto to get his family's recipe for cured, dried sausage. I'm not going to say how this happens, but let's just say that I have had the opportunity to try some of this imported meat product. A quick call to Italy and I had my recipe. Pork meat (shoulder would do nicely), fat back, salt, and black pepper. Also, I would need some type of casing to stuff this in. Fortunately, all of these materials were easily obtainable. With raw materials in hand, my career in meat curing had begun.


Cutting the Pork Shoulder


Mixing the Fat and Seasonings


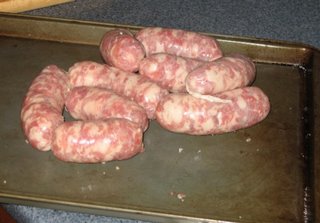
Don't ask how this got stuffed in the casing - Let's just say that it wasn't pretty.


Cool, dry air - do your magic

Now, all that was left was to wait. In the grand scheme of things, two weeks is nothing. But when you are living with great expectation and anticipation, it can seem like an eternity. After a mere 8 hours, I bubbled with glee as I studied the hanging meat - my fine handiwork. I could already detect a slight change in the color and surface moisture content. Over the next couple of weeks, I would run down to the basement dozens of times just to check things out. Finally, it was time.


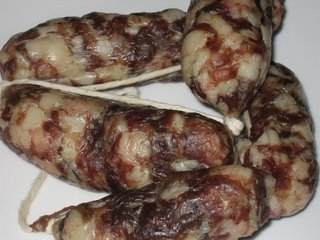
The finished goods

It was at this point that I made the mistake of researching the potential dangers of home cured meats. After some consideration, I had elected not to use nitrites as part of my curing mixture. I don't want to get into the technical details, but suffice to say that if you want to be absolutely sure that your cured meat is safe, use nitrites. However, they can transform into carcinogenic nitrosamines and may have potential health risks. Salt alone will prevent almost every harmful bug from surviving, but without nitrites, it is possible for one ugly food poisining situation to occur. If you want to read about botulism, be my guest. Keep in mind that sometimes, ignorance is bliss.

I was never really concerned about this danger, but as I held the first slice of meat up to my lips, the potential pain and suffering seemed to come to life in my mind. I chewed quickly and swallowed. I would wait a full 72 hours before pronouncing the meat "safe."

Having survived with no health effects, I brought the sausage in to work to "test out" on some of my co-workers. By now, I felt the freedom to enjoy the tasty morsels without irrational fear. The texture of the sausage was a little drier and harder than I was hoping for (update: due to overly dry environment), but sliced thinly, it had a nice texture. The flavor was outstanding. It had the sweet taste of supremely fresh pork, with a nice salty bite and a hint of black pepper. I was very satisfied with my first venture, but had not forgotten about my original plan to make guanciale.

Fortunately, my supplier had finally come through. The voicemail indicator on my cell phone was lit up. "Rich, we have your jowls."


Part 2 - Getting Cheeky
Part 3 - The Tasting